
But on the flip side, it is summer. Which in my mind translates to the perfect, laid back time to practice techniques and try out some styles. We aren’t confined to trying to fit a styling day in only on weekends. With Jennifer being home every day and all day, it seems like a good time for some trial and error since we have much more free time on our hands.
A few weeks ago I got a bug up my sleeve to try something. I wanted it to be a style that wouldn’t take too long, and that would be forgiving of the swimming water. I decided on cornrows which I had practiced on Jayla previously and was able to do. But with Jennifer I wasn’t quite sure if her hair was going to be long enough yet. With me being such a novice, I really need longer hair length in order to execute a corn row. When hair is too short I can’t get enough leverage with the 3 strands to give them the proper tension. So, I also had a back-up plan and decided that if I couldn’t do the cornrows then I would do flat-rope twists which utilize only 2 strands, and which I had also practiced on Jayla before our Ghana girls came home (you can see that adventure HERE).
I should mention what we did to prep Jennifer’s hair. It was washed the night previous. The morning of the style we had put water and coconut oil in it (our moisturizer of choice) and picked/combed it out. I purposefully left out the step of detangling. The detangler we use is SO GOOD that it makes Jennifer’s hair extremely slippery. I knew I would have a real tough time keeping a good grip on her hair if that detangler was in there.
We started the actual styling at about 5pm in the evening. I knew the style was only going to take a few hours, so I let her play all day and then sat her down to start sectioning out the rows while dinner cooked. She was in quiet tears that her play with Jayla had been interrupted and seemed to be dreading the process already. But I knew once we got going and she saw what we were doing that she would like it. Plus I let her play with the Nook which is usually reserved for a special treat. :)
When doing any sort of rows, I really like the look of incorporating diagonal parts when it’s a style for girls. Gives it more of a feminine/softer appearance. The parting scheme I was aiming for was something like this:

Since, for Jennifer’s sake, I wanted this style to go as fast as possible, I didn’t spend as much time as my inner perfectionist wanted to on getting the parts just right and proportional. I kept telling myself this is just practice. But later on I wished I would have mapped the parts out better as that sets the scene for the whole style really. We did cut about an hour of time out of styling by me ‘winging it’ on the parting though. For parting I used a metal pin tail comb and started with an ear to ear part. From there I made the main diagonal part going across the top of her head, and then I sectioned off the rows in between. Before parting each section I sprayed her hair with water. Although we skipped that detangling step, since her hair is so short, I was still able to comb through each section and get it parted quite easily and without breakage.
I found out with a quick row of trial and error that, as suspected, Jennifer’s hair was still too short for me to do corn rows. I’m sure a professional could do it but I think I need maybe about another inch of growth to work with before I’ll be able to. So, I quickly made that discovery and moved onto my back-up plan of flat rope twists. They give the same sort of look as corn rows, but just don’t last quite as long since the hair isn't as tight and tucked in. Here is a video showing the flat rope twist technique:
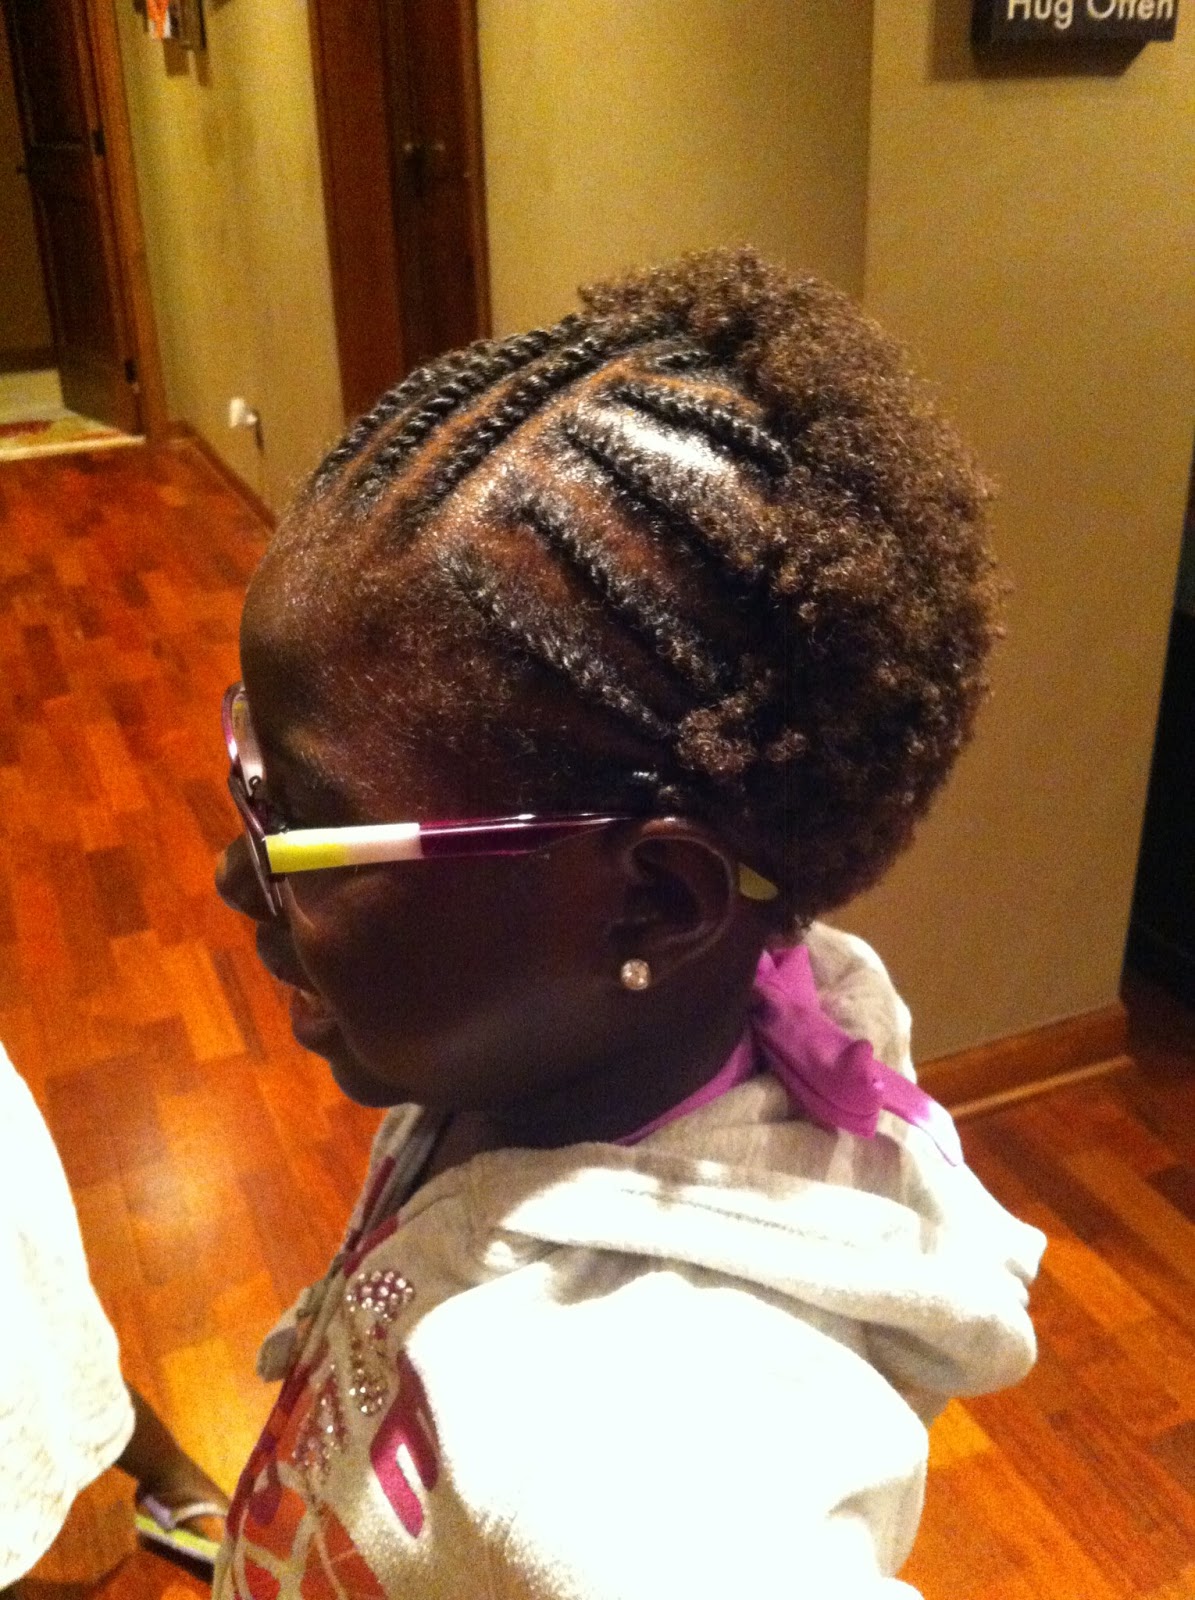
And here we are a couple of rows in:

Before I started each row of twisting I wet down the row of hair with a spray bottle, then added Blended Beauty’s Happy Nappy Styles (a holding cream) to it, and then combed through it again with my fine tooth comb. I ended each twist at the ear-to-ear part I had made and used a black rubber band to secure it (Side note: the rubber bands that I got at Sally's Beauty Supply specifically for African hair keep snapping and breaking daily. So I need to find some other ones). After these first 4 rows were finished I let Jennifer go peek in the mirror and her mood completely brightened. “That is SO COOL!” was her first reaction with a big smile. When we went back to sit down and keep going she said, “I’m not even tired!” :)
I was so thankful for her patience and we kept truckin along. By 9:30pm we were finished. And that was with a dinner break and a few small stretch breaks included in between. Not bad for our first go-round. I was very encouraged that I got better with the technique as we went along. I know the only way I am going to get faster is to practice, Practice, PRACTICE!
Here are the finished results:


And I had one happy kiddo. Jennifer is IN LOVE with this style! She kept saying things like “it feels so comfy!” and “I want to keep this in forever!” and “I’m not even sad that I didn’t get to play tonight!” And the next day she informed me that this is the style she wants to have in for when school starts! We’ll see if she sticks to that, but for now, I am considering this style a definite WIN!
