Showing posts with label Hair. Show all posts

Friday, August 23, 2013

Back 2 School

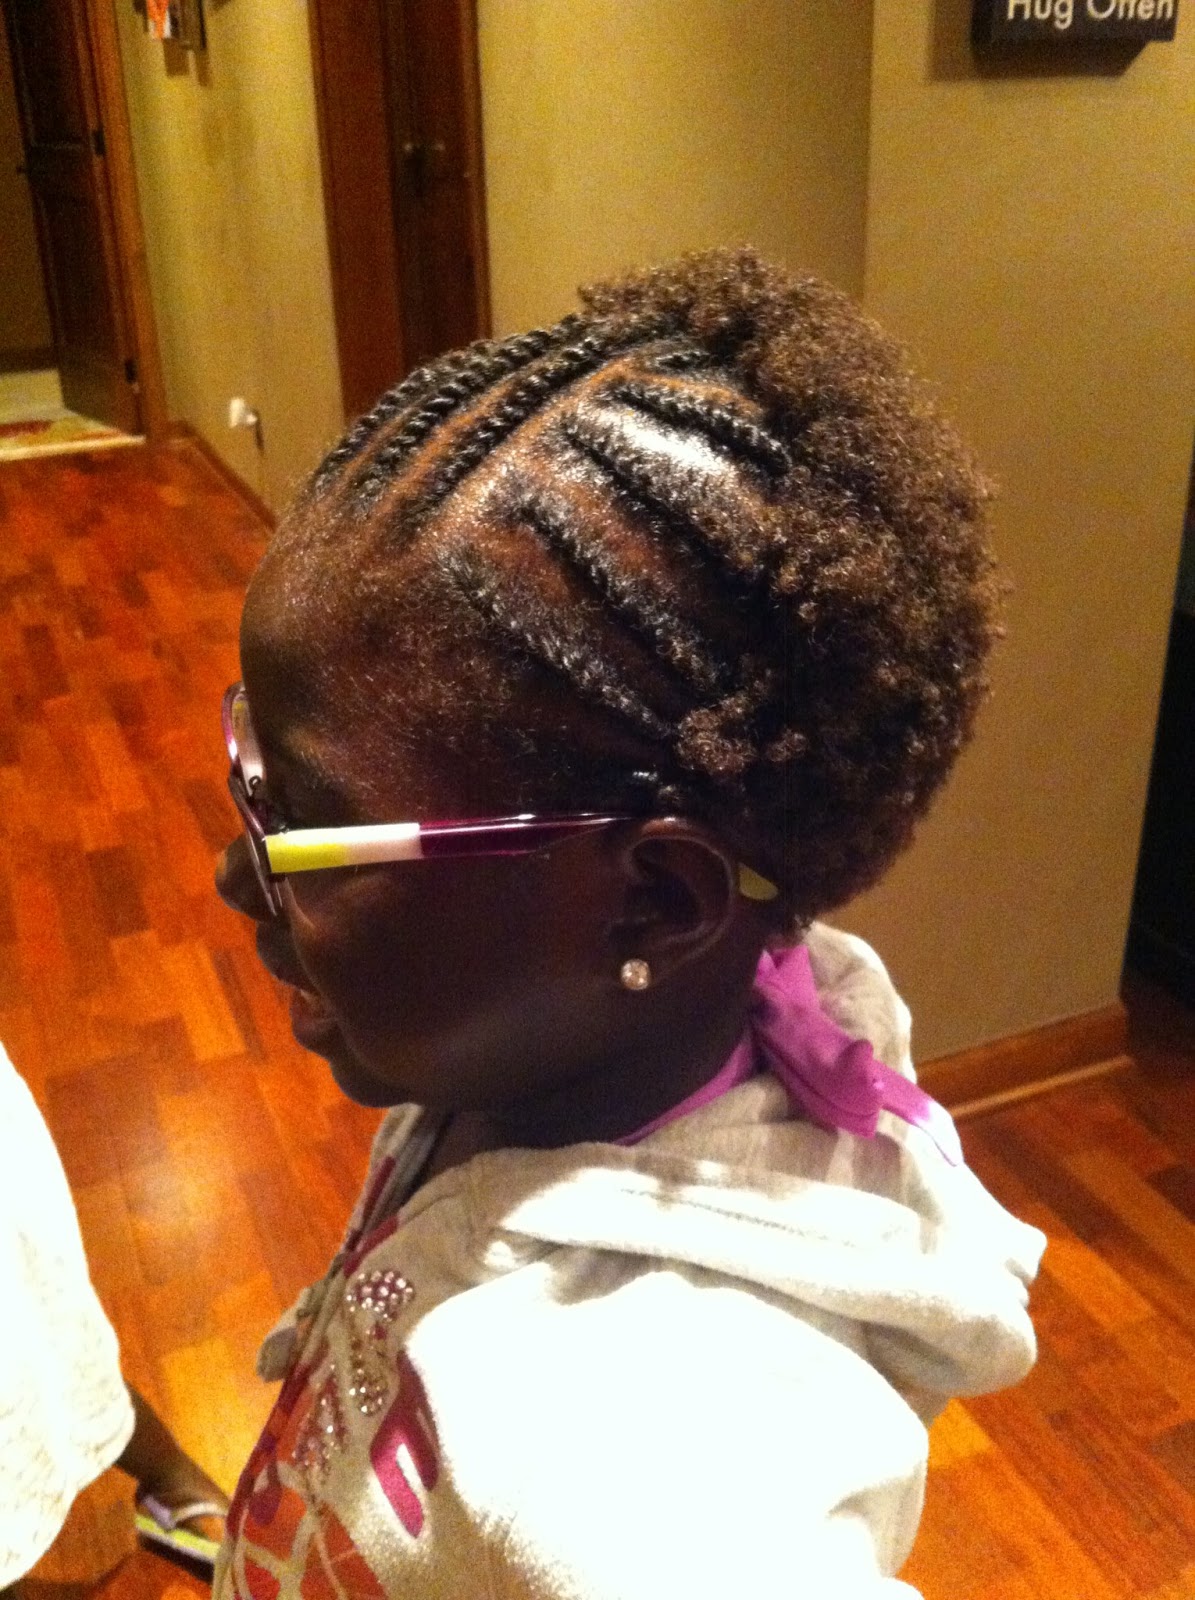
This week was a big week for us as it was back-to-school in our neck of the woods! First order of business leading up to the week was hair - believe it or not! Justice has been growing his hair out to get cornrows for a looooong time, but it was still too short for my novice hands to attempt it. Through our foster care/adoption network at church I found out about an ISU student who does cornrows for only $15! She does hair out of her apartment as a side-job so it was pretty simple to get in for an appointment and to get them done!

You can imagine that it takes some pretty skillful hands to braid that short of hair! But what you probably can’t imagine is that this only took her an hour and 15 minutes!!!!! I know Justice was thankful for that, as these ended up being quite painful to get put in since his hair was so short and she had to get each row real tight. He loved the outcome though and especially loves how low maintenance these are to care for day to day.

Jennifer wanted to go back to her long hair for school, so we set aside a day to put in extensions. This time however, I decided to use synthetic hair that you can get at Sally’s Beauty Supply as I had heard that it helps the style to last much longer than the yarn that we used previously. We used 100% Kanekalon hair…


I really, really want to do these extensions with beads on the ends some time, but when I practice putting the beads on the doll it just takes sooooo long. Doing the style already takes long enough! But I did want to give Jennifer a little color/spunk to the extensions…something different/special for back to school….so we added in some hot pink accents!  Here was the finished look!


These turned out SO FUN! The hot pink hair was also 100% Kanekalon however I picked it up at a hair supply store in the inner city…they don’t sell this at our Sally’s. I put these extensions in exactly as I did the yarn extensions, however, I had to knot and burn the ends (with a lighter) to seal them. With the yarn extensions I could just knot them, but the synthetic hair won’t stay with only a knot. Having to burn each end caused putting in this style to take longer than last time. For our next go-round I think we will need to spread out the styling over 2 days instead of our all day marathon. But seeing Jennifer swing her hair in the mirror full of giggles, and dance around the house in her excitement of having long hair makes all the hard work worth it!

And here were my babies on their first day of school which was Monday of this week! Jayla started Kindergarten (!!!!), Justice ~ 5th grade, Jennifer ~ 1st grade, and JJ ~ 1st grade.


I held it together in sending Jayla off for her first big day of school until she got on the bus, sat down, and waved from the bus window with her sweet little smile. I smiled and waved back, then turned toward the house and lost it while Kenny Chesney started singing in my mind as if on cue – “Don’t blink…”


Since then, it has helped tremendously that Jayla is SO EXCITED to go to school each day! She just can’t seem to get enough of it and is all bubbly and bouncing off the walls each morning while we get ready! Here are her first two pieces of school work that she came home with...


JJ is also pretty pumped about school right now, especially when it comes to reading! He is a memorizer, so reading has come rather easy to him which I am so thankful for. For 1st grade he has been given a reading log in which we record the amount of time each day that he reads to us, or us to him. For every 100 minutes logged in he gets to add a bead to his guitar necklace kept at school which their class will wear on special occasions. For whatever reason, this has just tripped his trigger and the kid cannot stop reading! Jake thinks it is his competitive nature and that JJ wants to beat every kid in his class and get the most beads. Well, I can tell you that he is definitely on track for that! He barely gets in the door from off the bus and he is asking if he can read to me. We set the stopwatch on the phone and he usually goes for 30 minutes straight. I have to laugh at his reading posture because he reminds me of a little old man reading a newspaper.
 

And did you notice what his choice of reading material is? That would be WWE character profiles and statistics. Every day this is what he reads to me. I should be able to spout off the biographies of every WWE character by the end of the month. :)

So with all the older rugrats in school now, that just leaves me and this little lady at home during the day!

Let me tell you, the girl is a HOOT! She has not missed a beat since the older ones have been gone! And having her one-on-one has helped me to appreciate her entertaining antics (and non-stop talking) much, much, more. :)


Saturday, July 20, 2013

Flat Rope Twists

I haven’t put a style in Jennifer’s hair since we did the yarn extensions a few months ago. Part of that is because it’s summer and we are literally swimming just about every other day. There is just no point to go to all that painstaking work of putting in a style when it is going to get quickly ruined by the wear and tear of the water and chlorine in no time flat (as soon as I can find a good one, we will be investing in a swim cap!).  In addition, Jennifer has not been begging me by any means to ‘do’ her hair. :)  Although she LOVED the yarn extensions, her spirits were dampened when it came time to take them out. From there, I think she also reasoned that every time we ‘do’ her hair it is going to take as long as the extensions did….a full day. In her little 6 year old world, it is not worth it to miss out on a summer day’s play to get her hair done, especially when it doesn’t stay in “forever” as she would like.

But on the flip side, it is summer. Which in my mind translates to the perfect, laid back time to practice techniques and try out some styles. We aren’t confined to trying to fit a styling day in only on weekends. With Jennifer being home every day and all day, it seems like a good time for some trial and error since we have much more free time on our hands.

A few weeks ago I got a bug up my sleeve to try something. I wanted it to be a style that wouldn’t take too long, and that would be forgiving of the swimming water. I decided on cornrows which I had practiced on Jayla previously and was able to do. But with Jennifer I wasn’t quite sure if her hair was going to be long enough yet. With me being such a novice, I really need longer hair length in order to execute a corn row. When hair is too short I can’t get enough leverage with the 3 strands to give them the proper tension. So, I also had a back-up plan and decided that if I couldn’t do the cornrows then I would do flat-rope twists which utilize only 2 strands, and which I had also practiced on Jayla before our Ghana girls came home (you can see that adventure HERE).

I should mention what we did to prep Jennifer’s hair. It was washed the night previous. The morning of the style we had put water and coconut oil in it (our moisturizer of choice) and picked/combed it out. I purposefully left out the step of detangling. The detangler we use is SO GOOD that it makes Jennifer’s hair extremely slippery. I knew I would have a real tough time keeping a good grip on her hair if that detangler was in there.

We started the actual styling at about 5pm in the evening. I knew the style was only going to take a few hours, so I let her play all day and then sat her down to start sectioning out the rows while dinner cooked. She was in quiet tears that her play with Jayla had been interrupted and seemed to be dreading the process already. But I knew once we got going and she saw what we were doing that she would like it. Plus I let her play with the Nook which is usually reserved for a special treat. :)

When doing any sort of rows, I really like the look of incorporating diagonal parts when it’s a style for girls. Gives it more of a feminine/softer appearance. The parting scheme I was aiming for was something like this:


Since, for Jennifer’s sake, I wanted this style to go as fast as possible, I didn’t spend as much time as my inner perfectionist wanted to on getting the parts just right and proportional. I kept telling myself this is just practice. But later on I wished I would have mapped the parts out better as that sets the scene for the whole style really. We did cut about an hour of time out of styling by me ‘winging it’ on the parting though. For parting I used a metal pin tail comb and started with an ear to ear part. From there I made the main diagonal part going across the top of her head, and then I sectioned off the rows in between. Before parting each section I sprayed her hair with water. Although we skipped that detangling step, since her hair is so short, I was still able to comb through each section and get it parted quite easily and without breakage.

I found out with a quick row of trial and error that, as suspected, Jennifer’s hair was still too short for me to do corn rows. I’m sure a professional could do it but I think I need maybe about another inch of growth to work with before I’ll be able to. So, I quickly made that discovery and moved onto my back-up plan of flat rope twists. They give the same sort of look as corn rows, but just don’t last quite as long since the hair isn't as tight and tucked in. Here is a video showing the flat rope twist technique:


And here we are a couple of rows in:


Before I started each row of twisting I wet down the row of hair with a spray bottle, then added Blended Beauty’s Happy Nappy Styles (a holding cream) to it, and then combed through it again with my fine tooth comb. I ended each twist at the ear-to-ear part I had made and used a black rubber band to secure it (Side note: the rubber bands that I got at Sally's Beauty Supply specifically for African hair keep snapping and breaking daily.  So I need to find some other ones). After these first 4 rows were finished I let Jennifer go peek in the mirror and her mood completely brightened. “That is SO COOL!” was her first reaction with a big smile. When we went back to sit down and keep going she said, “I’m not even tired!” :)

I was so thankful for her patience and we kept truckin along. By 9:30pm we were finished. And that was with a dinner break and a few small stretch breaks included in between. Not bad for our first go-round. I was very encouraged that I got better with the technique as we went along. I know the only way I am going to get faster is to practice, Practice, PRACTICE!

Here are the finished results:


And I had one happy kiddo. Jennifer is IN LOVE with this style! She kept saying things like “it feels so comfy!” and “I want to keep this in forever!” and “I’m not even sad that I didn’t get to play tonight!” And the next day she informed me that this is the style she wants to have in for when school starts! We’ll see if she sticks to that, but for now, I am considering this style a definite WIN!


Wednesday, April 24, 2013

Yarn Extensions ~ SUCCESS!

I last blogged about my ongoing adventure in learning to do my two Ghana daughters’ hair HERE.

For the past couple of weeks I had thought that Jennifer’s hair was getting long enough to try out a style. Here’s a look at the length of Jennifer’s hair when it is stretched out…

 
A good inch and a half I would say. With that length, I could definitely try some corn rows, but since Jennifer’s hair has been short and shaved her whole life, I thought it would be more exciting to try out some extensions. Jennifer is always happily wishing and looking forward to having long hair, as many little girls do. With that, I set my sights on achieving this style ~ yarn extensions…..

 
To attempt a style it was just a matter of us finding a weekend where we could be home for at least one full day with no place to go, and no other commitments (easier said than done!). I finally got my chance this past weekend. The boys were off to a tournament, and the girls and I decided to sit it out and stay home for a hair weekend.

During our adoption journey a fellow adoptive mom from my church had referenced this website: http://www.chocolatehairvanillacare.com/ (aka CHVC) which has become an invaluable resource to me. Leading up to this past weekend I reviewed the binder I had made from this website with the rundown on pre-style steps and the how-to instructions for the yarn extensions. Everything I am posting about today, I got from the CHVC website.

I set aside Saturday as our styling day, but we started the process on Friday night with washing, detangling, and banding.
 
 
WASHING: I usually only wash Jennifer’s hair once a week with conditioner. But since we were going to be setting it with a style that would stay in for a good 3-4 weeks I wanted to make sure we started off with clean hair. We washed with shampoo and conditioner from the Shea Moisture line (which you can purchase at Target and Walgreens) pictured above on the left.

DETANGLING: This was easy peasy since Jennifer’s hair is so short. I’ve heard this step becomes quite time-consuming the longer the hair gets. That is why the CHVC website recommends breaking the styling up into two days and doing this step the night before. For detangling we used Kinky Curly Knot Today as a leave-in conditioner/detangler (pictured above in the middle – you can also purchase this at Target). Then section by section I combed through her hair with a wide-tooth comb. After I combed through each section I banded it (explained below) before moving on to the next. The Kinky Curly Knot Today is just awesome. The comb glided right through her hair.

BANDING: Not sure how necessary this step is with short hair, but we did it anyways to get into the routine of it. Banding serves a couple of purposes – 1) It preserves all the work you did during detangling and 2) It stretches out the curl making the hair easier to handle once it is time to braid, twist, etc. To band, you just section off the hair and place soft pony tail holders down the length of each section. Since Jennifer’s hair is so short, I just used one pony holder for each section and tried to spread it out along the length of each little puff. This took about 15 minutes and then we were done for the night.

 
The other thing I did the night before the actual styling was cut the yarn. That’s right – YARN! For these extensions you are actually using a spool of yarn that you can purchase at Wal-mart!
 
 
It’s just the craziest thing. For each extension you use two strands of the yarn. I cut each strand to 40 inches in length and set them out on the table in pairs so I could grab and go the next day once we started.

 
Note to self: I ended up using twice as much as what is pictured here – had to do another session of cutting during styling day. The next morning Jennifer woke me up at 6:30am in her excitement to get started! We ended up actually starting around 8am by the time we all got breakfast and got dressed.

The CHVC website lists out the exact steps of how to put in the extensions, so I am not going to re-write them all here. Here is the link for the step-by-step-how-to complete with pictures: http://www.chocolatehairvanillacare.com/2011/01/yarn-twist-extensions-exercise-in.html
  
And here is a video tutorial of putting in one extension from start to finish:


I definitely needed to view the video to understand exactly how to anchor the yarn in. She shares a few tips in the video that aren’t in the written instructions, so make sure you watch it if you are planning on doing this. I memorized these steps and practiced one of the extensions on a life-sized doll with hair the day before trying it on Jennifer to make sure I had the technique down.  The day before our scheduled styling day I also practiced one extension on Jennifer's actual hair to ensure that her hair was going to be long enough to twist into the yarn.  And it was! 

Alright, here are the products and styling tools that I used while putting in the extensions…

 
Basically, to start, I just released one row at a time of her sectioned off hair from the pony tail holders and sprayed the section with water. Then I coated the section of hair with Blended Cutie’s ‘Butter Me Up’ which is a moisturizer. From there I used the pintail comb for parting. I parted one row at a time lengthwise and then made horizontal parts within each row, turning her hair into little sectioned off squares. When I was ready to put in an extension, I would grab one little square of hair and put another coating of ‘Butter Me Up’ on it, and then combed out the square of hair with my small-tooth comb. Then, you separate the square in half, put the yarn in the middle, anchor each side and start twisting as the instructions linked to above explain. Once I got to the point on the twist where her hair was going to run out, I was supposed to put Blended Beauty’s ‘Happy Nappy Styles’ styling cream onto her hair so the endpoint smoothed into the yarn better and didn’t poke out. But I got mixed up on the instructions and used the ‘Butter Me Up’ there as well which doesn’t have near the holding power as the styling cream. So, time will tell how long the twists will hold together without getting too fuzzy!

From the nape of Jennifer's neck up to the crown of her head, I parted her hair in a brick pattern. So, from one row to the next the boxes are staggered which is hard to make out from this picture below. The arrow shows the point where her actual hair runs out - everything below the arrow is yarn alone.
 
 
As her hair continues to grow it will blend in with the yarn even better for the length of the twist, and you won’t even be able to tell it’s yarn. Honestly, most people can’t anyways unless they know.

Here was our little over halfway point which we got to at about 4pm I think!

 
In that picture you can see the part that I made from one ear, to the crown of her head, to her other ear. Everything below that partline comprised the back of her hair. You can also see the ends of the extensions in this picture which I simply tied off in knots. My goal was to try and get the knots all at about the same length which was really hard to do. [At the very end of putting in all the extensions, you go back through and get the knots exactly where you want them, tighten them so they lay flat, and then trim off the excess yarn below the knots as the finishing step.]

We took breaks for lunch, dinner, bathroom breaks, stretch breaks, and a long run around break while I cut more yarn. :)


From there, I started putting the extensions in on the sides of her head, working up to the top-center where I had made a middle part.
 
 
Regarding parting, the side extensions are easy to line up because you just continue a straight line from the last extension by the crown, on up to the forehead comprising the row.

Finally, after a full day’s hard work, there was one row left to twist!!!!!!!!!!!!!!!!!!!!!!!!!!!!!!! Momma was ready to throw a party!

 
And about 25 minutes later, all the extensions were in and all that was left to do was the trimming!


Did you notice the clock in that first picture? Yes, by this point it was 11:37pm!!!!!!!!!!!! I had scheduled myself to work in the nursery at church the next morning at 9am, so I knew we had to bear down and finish it all that night. We wouldn’t have enough time to save the trimming until morning, and besides, it wouldn’t be very comfortable sleeping on all that excess yarn anyways.

So, although we were both quite tired, we kept trucking along. I went through and adjusted all the knots at the bottoms of the extensions so they were as close as I could get them to the same length. I also tightened up each knot and tried to get them as flat as I could. This part can drive you a little crazy, especially if you are really set on everything looking symmetrical. CHVC gives some trimming tips HERE. Finally I got to the point where I was comfortable to start trimming off the excess right below the knots.  The whole re-knotting and trimming episode took another good 45 minutes. After the trim we threw on Jennifer’s sleep cap and went to bed. The next morning we captured the results…..here’s how they turned out!

♥
 
♥
 
♥
 
 
♥
 
 
♥
 
 
♥
 

And the back....
(side note: in real person her scalp does not show up this much - it is just the flash from the camera that is highlighting/reflecting it)
 
I was so happy with how they looked! Jennifer could not WAIT to show her friends in her class at church, and she couldn’t wait for school the next day after that. She kept saying, “Everyone is going to looooove my head!”

Throughout the styling day, if I would have counted, Jennifer said at least 25 times, “Mommy, I LOVE my head!” She also told me, “Mommy, I love YOU!” randomly throughout the day, and about every 15 minutes she was shouting to Jayla in her excitement, “Jayla, you want to come see my head?” During each break time she would run to the mirror and giggle, oooh and ahhhh, and shake and whip her hair around. It was definitely the most excited I have seen her – ever. I knew going into this that me doing her hair would come across as an act of love to her, and I think that is what kept me going and made me so excited for us to experience it. It was another step in attachment for the both of us.

Throughout the day, I also experienced an amazing sense of empowerment which came in the form of just plain being in awe of how God equipped me to this. Going into our adoption of the girls I had zero confidence in my ability to do their hair. BUT, I had a desire to learn, and I expressed that desire to God often. He led me to the resources and gave me the tools that I needed to educate myself. Then, He took my flimsy hands and non-hairstyling brain and physically equipped them. I give Him the glory, because I know that in and of myself doing hair does NOT come naturally. I know it sounds strange because we are talking about hair (which seems like a minor detail to most people), but this feels like a supernatural equipping within our adoption. I had no idea that I would ever actually be able to do this!  You all remember where I started out right?  I didn't even know how to french braid for goodness sakes!  Yarn extensions are just a small success in the world of hair, but I definitely feel encouraged by this, and I am excited for when we get to try another style!

In addition to all that, Jennifer’s confidence has SKYROCKETED since these extensions went in. I've noticed a remarkable difference in her in what I can only describe as her coming across as more sure of herself and just plain being more bubbly and outspoken. It’s like her timid-ness went out the window as soon as the hair started going on. Very noticeable change in her personality!

This was also a good learning experience for Jayla. I knew going into the styling day that it was going to be hard for Jayla to watch Jennifer getting all my time and most of my attention that day. In a 4 year old’s world, this was going to feel like sacrifice, and it wasn’t going to feel good. I prayed for her leading up to it, that God would work in her heart. As the styling day started out, Jayla did have a bad attitude and bouts of pouting as I knew she would. I just took those opportunities as teaching moments and took her aside and prayed with her. Each time we talked about 1 John 3:16 and that this day was going to be a little example of how she could ‘lay down her life’ for Jennifer. I expressed to her that sacrifice doesn’t feel good because we are giving up what we want for ourselves. But that is God’s definition of love – acting in the interest of others instead of ourselves. God was giving her the opportunity to do just that during styling day. Throughout the morning I think I took Jayla aside about 3 different times and prayed for her and talked through these truths. By afternoon, the coolest thing happened. God had worked in her heart, and I noticed her attitude had completely lifted by about 2pm. She was excited for Jennifer and became her lighthearted, talkative self again. And God rewarded her change in heart. The neighbor girl came outside to play, and Jayla got to run around and play with her – all by herself! This then, produced tears and a bad attitude from Jennifer who really preferred to go outside and play instead of sit in the styling chair! Sheesh! I can’t win! :)

Alright, to finish out this post, a few more tips regarding the actual style. CHVC has a post about washing hair with yarn extensions in HERE and other tips and tricks for this style HERE.

Jennifer started wearing a sleep cap once these extensions went in, and it really does help to preserve the style through the tossing and turning in the night. She also uses a satin pillowcase which helps with that too. And she wears a shower cap during bath-time to avoid getting them wet unnecessarily.

For daily upkeep, when she takes her sleep cap off in the morning I then straighten out the yarn by taking fists of it on each end (below where her actual hair ends) and stretching it. Takes like 30 seconds to make a trip around her head. Then I have a water bottle with ¾ coconut oil and ¼ water mixed together. I spray that on the twists, but only on the inch segments where her actual hair is. That gives her enough moisture for the day and she is all set!

When I picked Jennifer up from her Sunday school class at church on the first day that she was sportin her extensions the teacher said that her hair was the talk of the class. She said the kids were asking, “Where can we get some hair like that?” The teacher said she had told them that it takes a reaaaalllly long time to get hair like that put in, and that it is reaaaaalllly expensive! Ha! Made me giggle knowing that in fact, it was only a $4 spool of yarn behind that look! And it gave me some more confidence to hear that her style looked like it had been achieved in an expensive salon! Whoo hoo! 

Tuesday, January 8, 2013

Current Daily Hair Care Routine

I thought I had better post about our current daily hair care routine for our girls since it’s going to be changing soon as their hair starts getting longer!

Before our girls came home I went through this website: http://www.chocolatehairvanillacare.com/ with a fine-toothed comb (hee hee) to come up with some sort of plan of what I was going to be doing! I studied her posts, made a binder of style instructions and photos and practiced techniques on Barbies and Jayla. Most of all, I needed lessons on the care and maintenance of African hair. Everything I have below I learned from this website.

Right now since Jennifer and Jasara’s hair is so short, my main job is keeping it moisturized and promoting growth….I won’t attempt any styles until it gets a bit longer. African hair is different from Caucasian hair in that theirs does not produce as much oil as mine does. That’s why I have to wash my hair every day so it doesn’t look greasy, and that’s why I have to add some form of oil [our African friends call it ‘grease’ :)] to their hair every day to combat the dryness. The first piece of success that I learned from this website was that African hair oil moisturizers/lotions ‘work’ (my determination for that is that they make the hair look good) by sealing in moisture….which means there has to be moisture there to seal in….moisture=WATER. Therefore, STEP 1 as soon as the girls head into the bathroom in the morning to get ready is to spray water onto their hair via a water bottle sprayer (since they bathe at nighttime this is the easiest way to get their hair wet in the morn). We do drape a towel over the girls' shoulders to catch run-off.  Justice, who goes through the same hair routine when he wears his longer, prefers to just dunk his head under the bath faucet each morning to wet his hair (since he showers at nighttime).

Morning hair routine Step 1: Spray hair with water or somehow get it wet.
 
Next comes the oil moisturizer. Jennifer and Jasara have different curl types so I don’t use the same moisturizer for both of them. On the Facebook feed for the above website, it is kind of a toss up between whether olive oil or coconut oil is preferred best. I’ve tried olive oil moisturizers on Justice’s hair before, and it just wasn’t enough for him. His hair would be curled back into little balls about mid-way through the day and look unkempt even though he just did it a few hours earlier. When I found out about coconut oil on the website (read the post here) and we tried it on his hair (which has a very strong/tightly coiled curl) it gave a lasting effect throughout the day. Since Jennifer’s hair is a similar texture to his, I went with the coconut oil for her moisturizer as well and it is working great for what we need it for right now. You actually get this coconut oil in the organic food aisle in your local grocery store!!! Don’t look in the hair aisle – you won’t find it there!

Morning hair routine Step 2: Add oil moisturizer. For Jennifer we use coconut oil.
 
I just scoop out a little coconut oil with my fingers (which is solidified in the jar more like a butter) and rub it in my hands until it melts. Then I massage it into Jennifer’s hair. Once her hair is covered I then do Step 3 which is using a pick to comb her hair out. The first few months I actually used a regular fine toothed comb to comb it out because her hair was so short (since it had been recently shaved) and I needed some tighter 'teeth' to reach the tight coils. Now that her hair has grown out to almost an inch in length, I only use the tiny black comb on her hair line because it breaks her hair since it is thicker now. I use the pick over her entire head. So, for a recap, here is what we use for Jennifer’s morning/daily hair routine, in order from left to right:
 
And below are some before and after snapshots of ‘doing’ her hair in the morning. I am kind of disappointed in this before picture because it is so hard to get a feel for the dryness from the photo. But, when Jennifer wakes up her hair has clumped together in little balls/tufts all over.

BEFORE…
 
Then, you can see here in the after picture how it is smoothed out and looks soft. AFTER…
 
The hair will sparkle and look and feel 'wet' right after you moisturize with the coconut oil...but it will soak in to the hair in no time flat!

Since Jasara was malnourished as a baby/toddler, one of the effects is that her hair didn’t grow. So, now that her hair is coming in it is ‘baby hair’ which has a very soft texture and loose curl. Her hair has also never been cut, which I am told by the Ghanaian mommas will help her to keep what they call ‘good hair’….the soft texture and loose curl that she has now….time will tell….it may just be a myth. For her hair, an oil lotion provides just the right amount of moisture to define her little curls and keep her hair from getting dry and frizzing out. The straight coconut oil that I use on Jennifer’s hair would be way too runny and ‘slick’ for her curls. So for Jasara, I just picked an oil lotion that they had in the ethnic aisle at Wal-mart….this is the one that I chose:
 
You can see that this is an olive oil. Right now I use maybe 2 quarter-sized dollops on her entire head, and then I comb it out with the pick pictured. I wouldn’t dare use a fine-toothed comb on her hair because her curls would snap and break the second I hit a tangle. As a recap here is what I use for Jasara’s morning/daily hair care routine, in order from left to right:
 

Here are the before and after snapshots for Jasara...BEFORE...
 

AFTER...
 
And I tried to get a zoomed in shot so you could see her defined curls….I took this about 30 minutes after I did her hair one morning….so the moisturizer is all soaked in and you can really see her coils!
 
Another big thing I learned on the website is that African hair does not need to be washed daily, but more like weekly! And, it is recommended to not use shampoo for the washing because it really strips their hair of the moisture that they need. Instead, you can use a conditioner for the washing, which will still cleanse the hair, but will add moisture back in during the wash instead of taking it away like a shampoo does. For us, I picked one day each week that we will wash Jennifer and Jasara’s hair with conditioner. We do so on Saturdays. I picked the Shea Moisture line which gets great comments on the website’s Facebook feed. I’ve seen these products so far at Target and Walgreens. For Jennifer we wash her hair on Saturdays with this conditioner:
 

For Jasara we wash her hair on Saturdays with this baby head-to-toe wash:
 
An added bonus with the Shea Moisture line is that the products smell sooooooo good AND the lady who developed the products back in the 1900’s has a really cool story…it’s on the back of the products.

One other thing to mention is that the website mostly recommends organic products which tend to be a bit pricier….for example the coconut oil is $12 per jar. HOWEVER, we are using such small amounts of these that these bottles are lasting a really long time! I am only about half through each of the products I've pictured in this post (other than the head-to-toe wash since we also use that for body wash), and the girls have been home almost 3 months.

Other than the difference in washing, I realized that the daily hair care routine I am doing for Jennifer and Jasara is actually very similar to what I have been doing with Jayla and her wavy curls. The only difference is that for Jayla right now I actually have one more step added in – DETANGLING! Eventually as Jennifer and Jasara’s hair gets longer this will be a big (and from what I’ve read, time-consuming) part of their hair care that will happen after washings and before putting in a style. Here is what I am using on Jayla right now in order from left to right…..water sprayed on, detangler, pick it out, curl defining lotion.
 
I just find it interesting that I am essentially doing the same steps with Jennifer and Jasara’s hair, just using different products and dealing with different textures. :) Of course everything will change once I can start doing styles in the girls' hair since the styles typically can stay in around 4 weeks at a time. That will be a whole other adventure (and new routine) that I will update you on when we get there!

While I am on the subject of body care, just wanted to also mention what we use for skin care for our Ghana kids….once again, African skin needs a lot of moisture added back in….I cannot even explain how this Iowa air sucks their skin SO dry! When we were in the midst of Justice’s adoption one of my African mom-friends gave me a rundown on skin care products. She told me that you cannot go wrong with the Vaseline brand for African skin, so we went with it and it has worked great! This is what we use:
 
The kids put it on every square inch of their skin – even their faces – every morning. That usually lasts them the whole day. Very rarely, but sometimes they have to reapply on knees, elbows, and dry “ashy” spots a second time in the day...but that is hardly ever.  We go swimming quite often too, and that does a number on our Ghana kids’ skin. After swimming sessions they use pure Vaseline petroleum jelly to moisturize.  I know it sounds sticky but their skin absorbs it like the desert does rain!

So that’s that! I hope to post more updates as things change in the hair department. I’ll leave you with what it looks like to paint 30 fingers and 30 toes!!!!!!!!!!!!!!!!!! Whew!